Getting started
This page walks you from a fresh Unraid box to your first backup.
Requirements
| Requirement | Notes |
|---|---|
| Unraid 6.12+ | Earlier versions are not tested. Unraid is the main target, but BombVault also runs on a plain Docker host and on TrueNAS Scale (see Generic Docker host). |
| Restic repo location | A local path (recommended: your array or cache), SMB, NFS, or any rclone backend. |
| Docker socket | Mounted by the template automatically (/var/run/docker.sock). |
Unraid flash (/boot) |
Mounted whole by the template automatically (/boot to /host/boot). Powers flash backup and lets a restored container reappear as a normal, editable Unraid app. |
| KVM VMs (opt-in) | VM backup talks to libvirt over SSH, no libvirt mount. Set it up in Settings (see Configuration). |
| ZFS datasets (opt-in) | The same SSH link as VM backups, zfs on the host, and Host Data mapped as /mnt with access mode Read/Write - Slave, the template default. See ZFS datasets. |
| Android app (optional) | Android 10 or later, paired with servers on version 9.7.0 or later. See Android app. |
Install on Unraid
The easiest path is Community Applications.
- Open the Apps tab in Unraid.
- Search for BombVault.
- Click Install, set the required variables (below), and apply.
Manual template install
If you prefer to add the template by hand:
- Go to Docker, Add Container, Template repositories and add:
- Search for BombVault in Templates.
- Set the required variables and click Apply.
Generic Docker host
Not on Unraid? BombVault also runs as a plain container on any Docker host (this is also what powers containers-only support on TrueNAS Scale, ahead of its own app-catalog entry).
- Grab the ready-to-edit
deploy/docker-compose.generic.ymlfrom the repo. - Set
APP_KEY(see below) and point the Host Data volume at your real data root — the file's comments walk through both. docker compose up -d, then openhttps://<host-ip>:3443/.
What's different from Unraid:
- No flash/USB domain. There is no boot USB to capture or restore, so the Flash domain in Settings has nothing to do here. Instead, the Folders domain offers a one-click Add preset: Host system config suggestion (a starting
/etcfile set you review and edit before saving) as a practical, generic equivalent. - No Unraid-native notifications. BombVault's own in-app notification channels (webhook, off-site failure alerts, etc.) work as normal; only the Unraid-specific push to its native notification system is skipped, since there is no such system to push to.
- VM backup is opt-in and needs a separate libvirtd host reachable over SSH — see the commented-out block in the compose file. There is no VM manager built into a generic Docker host itself.
- No dashboard widget. The BombVault Widget is an Unraid plugin, so that step is skipped as well.
- Finding a container's data. Without Unraid's
appdataconvention, a container's data folder is found from the segments inDATA_ROOT_SEGMENTS, Docker named volumes, a Compose project's working directory and thebombvault.datalabel (see Backup source detection). Named volumes and the/etcpreset only reach paths inside the Host Data mount, so point Host Data at a common ancestor that also covers Docker's data root. PLATFORM. Set it togenericortruenas. Left unset, BombVault detects Unraid by its own marker on the flash mount and treats anything else as generic, and the Unraid-only steps are skipped instead of tried and failing.
TrueNAS Scale takes the same compose route; a catalog entry is prepared in the repository but not submitted yet. VM backup there needs LIBVIRT_URI, because TrueNAS's libvirtd listens on a socket of its own (/run/truenas_libvirt/libvirt-sock) that the three LIBVIRT_* variables cannot express (see Configuration). How far this is proven: the zvol backup was run against a real TrueNAS Scale box, on a zvol attached to a running VM, and zfs snapshot, zfs send, restic and zfs receive round-tripped it byte for byte. A complete restore driven by BombVault itself has not been run on TrueNAS hardware yet, and that zvol was sparse, so throughput at many gigabytes is untested. Test a restore there before you rely on it.
The one required setting
The only variable you must set is APP_KEY, a 32-byte hex secret (64 hex characters) used to derive the restic repository password.
Generate one on any machine:
Paste the result into the APP_KEY field of the template (Unraid), or the APP_KEY environment variable in docker-compose.yml (generic Docker host).
Do not lose your APP_KEY
Losing APP_KEY makes your encrypted backups unrecoverable. Store it somewhere safe and separate from the server. Once BombVault is running, use its one-click encryption-key recovery kit (see Off-site & recovery) to save the full recovery bundle.
The template also mounts the Docker socket, the flash (/boot) and the Host Data root (/mnt) for you. Backup sources and destinations both live under Host Data. For the full variable reference and the off-site setup, see Configuration.
First run
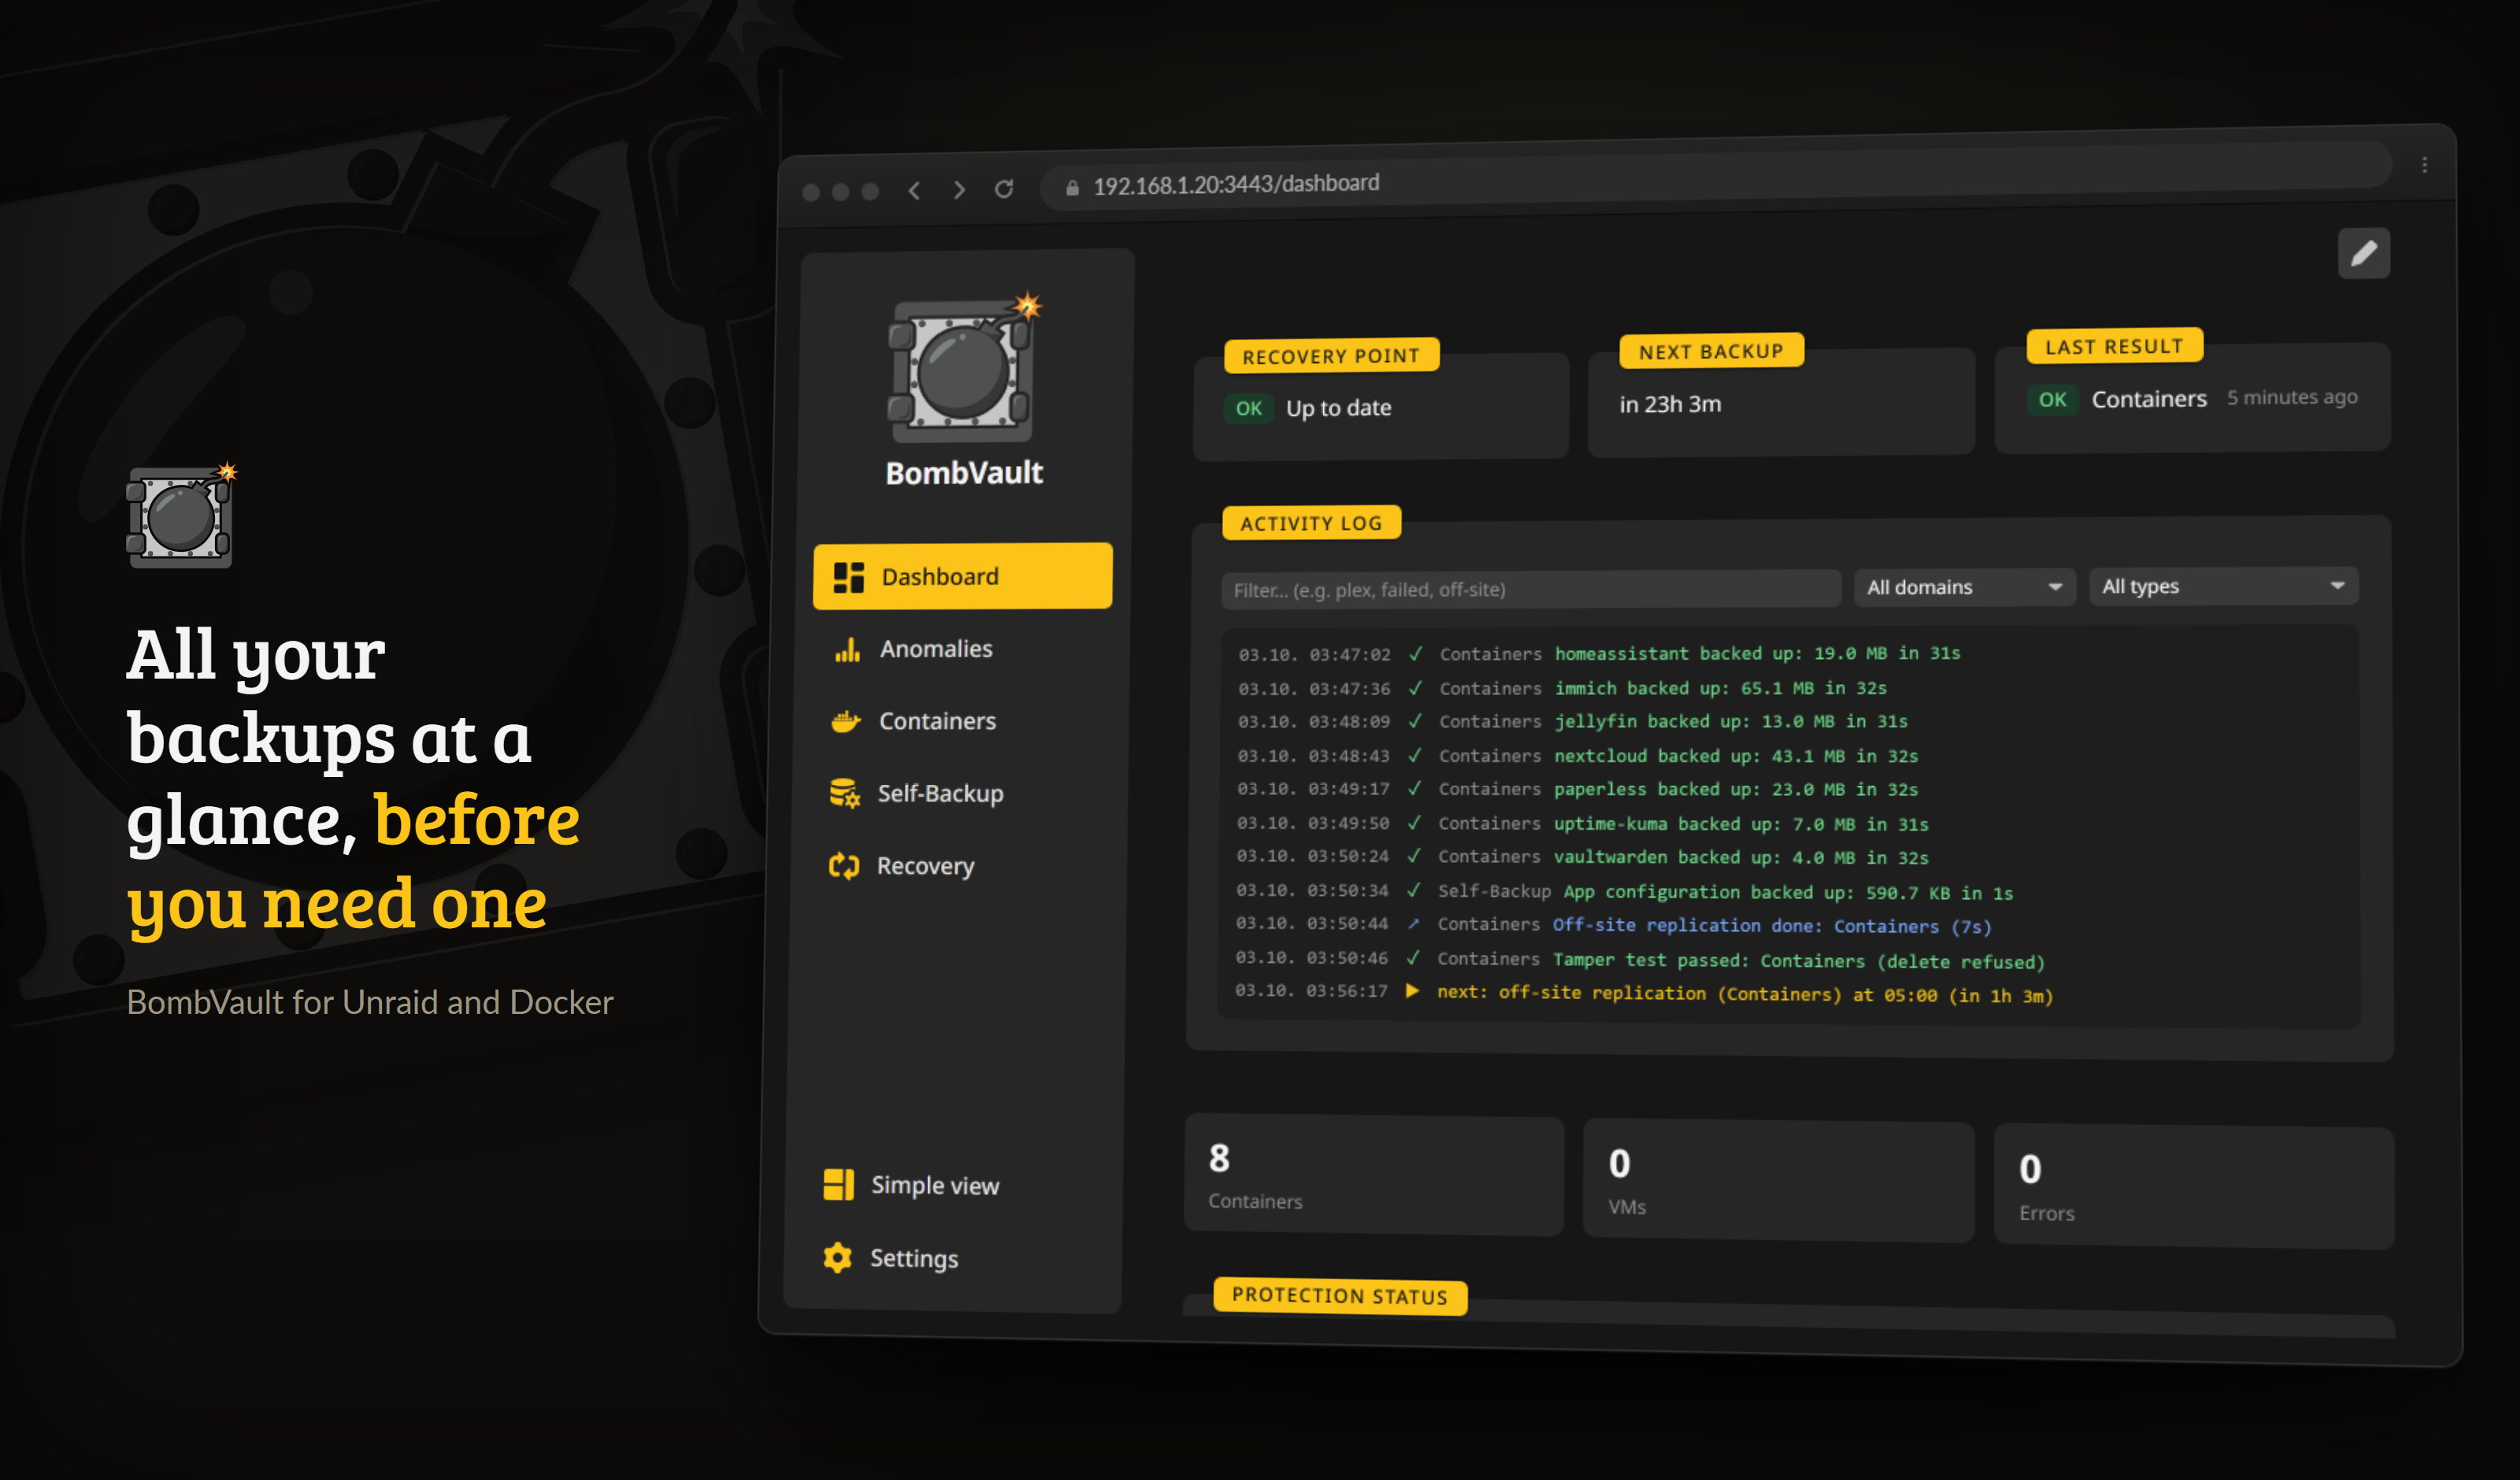
The dashboard after a first backup: what is protected, what runs next, and a live log.
- Open the web UI at
https://<your-unraid-ip>:3443(self-signed certificate out of the box). - In Settings, enable the backup domains you want (Containers, VMs, Flash, Self-Backup, Folders, ZFS datasets) and pick an accent colour.
- On the Containers tab, pick a container and click Back up now to make your first restore point. Repository paths default to
/mnt/user/bombvault/{container,vms,flash,config,files,zfs}and are created on the first backup. - Set up scheduling from Settings, Schedules. There is a one-click Include all in schedule for containers and VMs.
Optional: pick a backup order
If some containers should always be backed up before others (for example a database before the app that uses it), open the Backup order panel on the Containers page and drag them into the sequence you want. Scheduled and multi-select runs then follow it; anything you leave unordered is backed up most-overdue-first, as before.
Host Integration Check
Open /spike in the web UI after the container starts. It probes every mount and CLI (Docker socket, libvirt, restic, qemu-img, rclone) and reports any missing pieces, so you can confirm the container is wired up correctly before you rely on it.
Simple vs Advanced
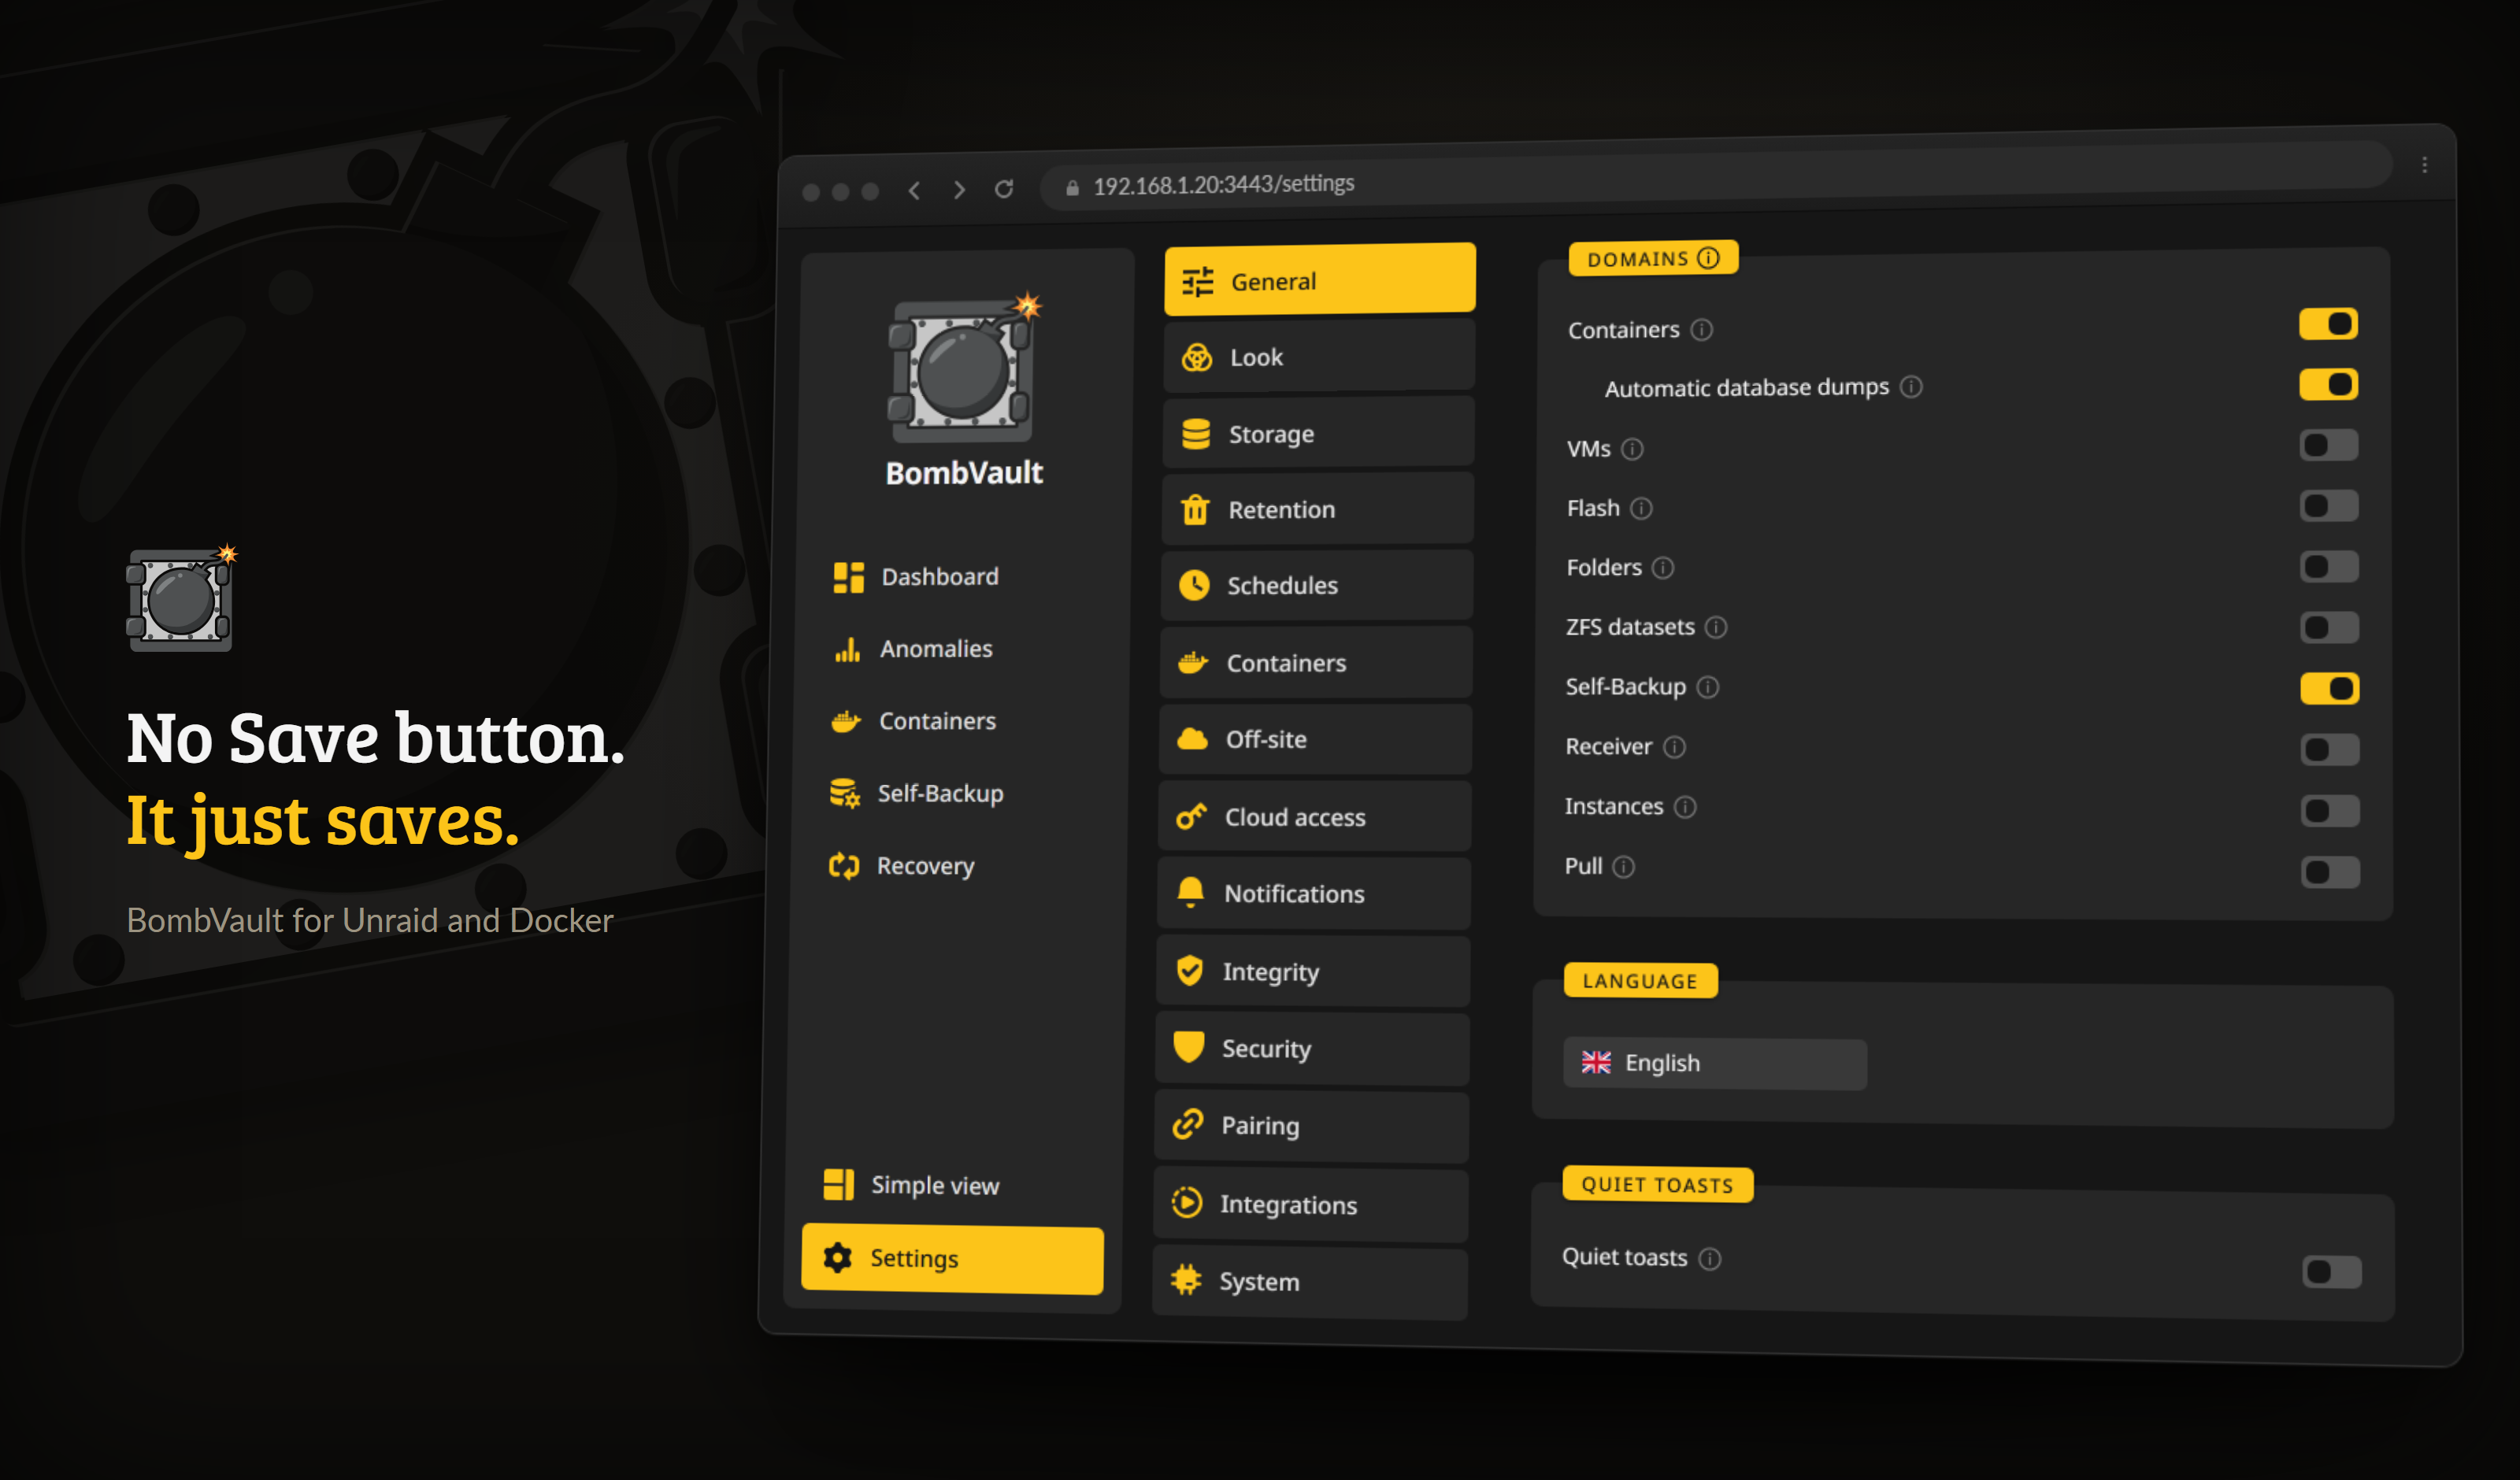
Settings has no Save button: every change is written as you make it.
By default the interface shows only the essentials (back up, restore, schedule). Use the Simple view / Advanced view switch in the sidebar to reveal the expert controls: retention, off-site copy, pre/post hooks, file-level restore, notifications, Prometheus metrics and the integrity/maintenance tools. It is a per-browser preference and off by default, so newcomers get a clean UI and power users get everything.
Building from source
BombVault is a single static Go binary that serves a JSON API and an embedded React interface. Build the interface first, then run the binary:
npm --prefix web ci
npm --prefix web run build     # writes web/dist, which the binary embeds
export APP_KEY=$(openssl rand -hex 32)
go test ./...                  # unit and integration tests, with a real restic round trip
golangci-lint run ./...
go run ./cmd/bombvault         # serves https://localhost:3443 with a self-signed certificate
The interface build is needed for go run too. The repository tracks only an empty marker under web/dist, so without npm --prefix web run build the binary embeds nothing and answers 500 SPA index not found, which is expected. Docker, libvirt and Unraid cannot be tested in CI, so check mounts, restic and the VM SSH link on a real host with the Host Integration Check (/spike) before you open a pull request.
Next steps
- Browse the full Features.
- Put every server of your group on your phone with the Android app.
- Add one or more Off-site & recovery replicas (each domain can ship to several destinations at once) and save your recovery kit.
- Cloning a setup or moving to a new box? Carry your whole configuration over with the Export / import settings card. See Configuration.
- Hit a snag? See Troubleshooting.